Add New Property
Use this function to add a new field under a selected property group. The added property is added to the selected CI's blueprint. Refer to Details - Add Property.
| Depending on which option you select--Add Manually or Import from Excel--the dialog box displays with different fields. |
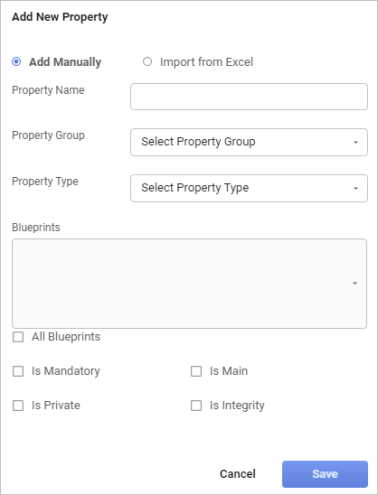
| 1. | In the main window, click Admin > SACM > Add New Property. The Add New Property dialog box displays. By default, Add Manually is selected. |
| 1. | In the main window, click the gear icon and select SACM > Add New Property. The Add New Property dialog box displays. By default, Add Manually is selected. |
| 2. | Refer to the instructions below for manually adding or importing a property. |
![]()
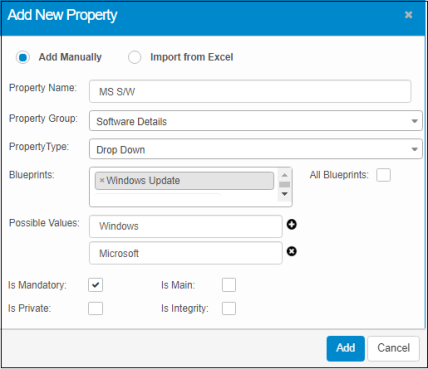
| 1. | In the Add New Property dialog box, click Add Manually and complete the fields according to the table below. |
| 2. | When all selections/entries are made, click Add. |
| 3. | If the information is valid, a success message displays. Click OK. |
| Field | Description |
|---|---|
|
Property Name |
Name to assign to the field. |
|
Property Group |
Specifies the group in which the field should display. Click the drop-down list and select from the options given. |
|
Property Type |
Defines the type of property, such as string, integer, or data. |
|
Blueprints |
Specifics which blueprints apply to which property. |
|
Possible Values |
Designates what values will be show as an option in the Property Type field. |
|
Is Mandatory |
Indicates a field value is required. |
|
Is Private |
When marked as private, the property is only visible for certain users, groups, roles, or departments. |
|
Is Main |
Specifies that the property displays in the Main Properties area of the applicable windows. |
|
Is Integrity |
Highlights the properties that should always be kept up-to-date based on which CI confidence/rank is calculated. |
| 1. | In the Add New Property dialog box, click Import from Excel. The Add New Property dialog box refreshes and displays a new set of fields. |
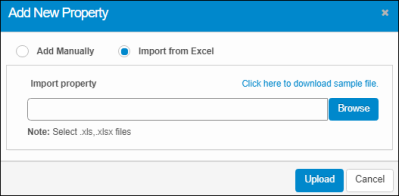
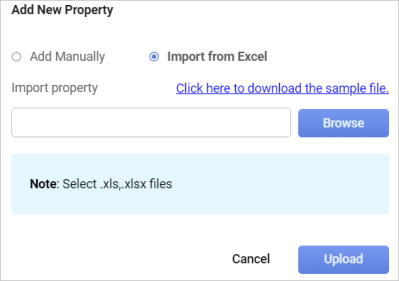
| 2. | To view a sample file, select Click here to download sample file. A sample file may look similar to the following: |

| 3. | In the Import property field, click Browse and select an allowed file type (such as .xls, xlsx). The name of the file is shown in the field. |
| 4. | Click Upload. The file is uploaded into the application. |